How to use ScanSnap
Logging in, and using ScanSnap
-
When you log into the computer, double click the “ScanSnap” icon on your desktop.
 \
\-
Once opened, you are good to go with scanning.
When you log out and log into different accounts, ScanSnap will disconnect from the scanner. Below will show you how to re-connect.
Re-connect to the scanner
-
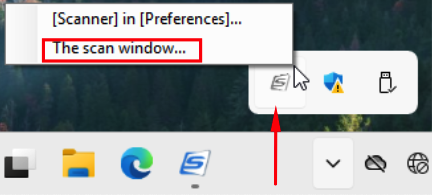
On your taskbar, locate the time and date, then look for the carrot.

-
Once located, click the carrot, and locate the ScanSnap logo. Once found, right click it and hit “ The Scan window…” as shown below.
-
Once clicked, you should see a window open, it will say “Not Connected” and have a blue button that you can press. As shown below, press the “Connect to the scanner” button.

This should re-connect the scanner, and allow you to scan.


How to use ScanSnap
ScanSnap is a scanner that leverages software to accomplish it’s scanning goals. The software is used minimally, but, is important to send files to their networked folders. Below is a demonstration on how to use the scanner.
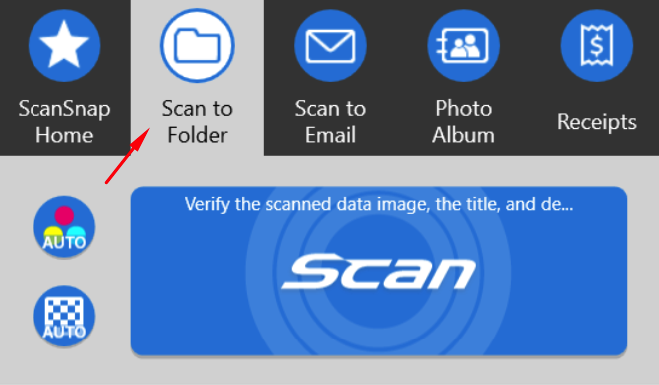
1. With the scanner powered on, ensure that you select “Scan to folder”.
-
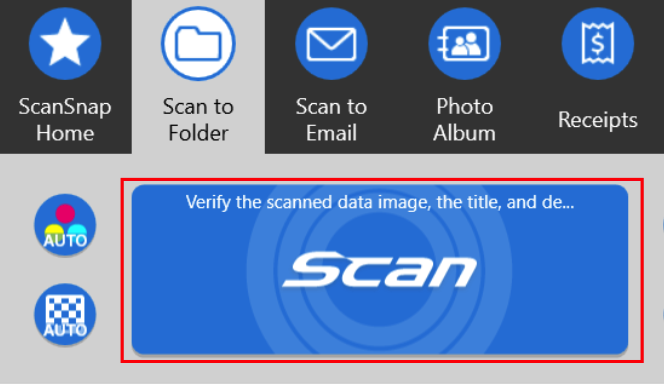
Once you’re on Scan to folder, load your documents and hit “Scan”. The scanner is pre-configured to send documents to the Health Center reception desk.

Once completed, you should see the scanned documents under “Xerox Scans”
No comments to display
No comments to display